Plants
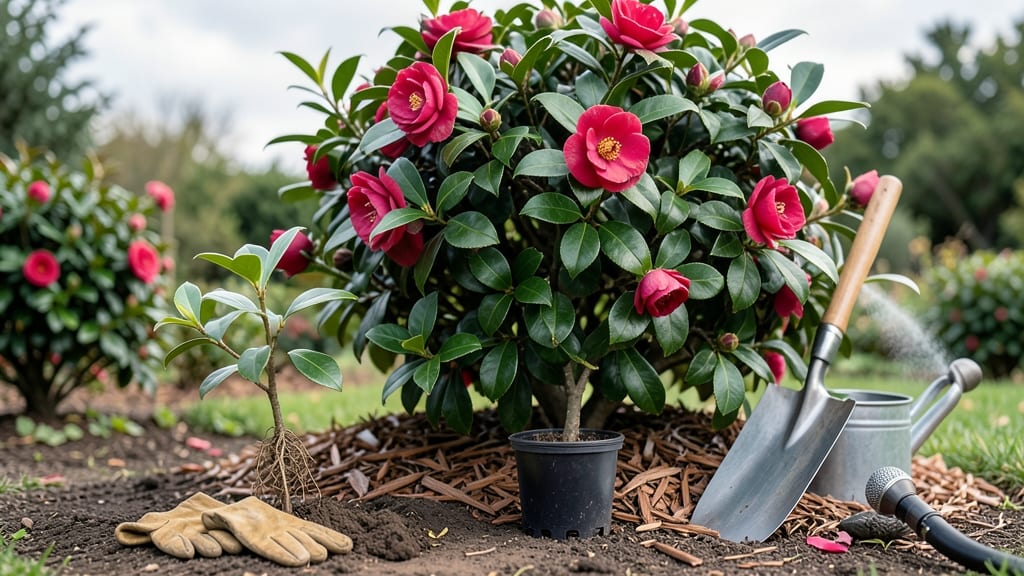
Planting your Camellia 🌸 at the wrong time in Zone 9 could mean the difference between a thriving shrub and one struggling to survive.
The key to lush, blooming camellias lies in understanding when to plant them—late fall to early spring is your golden window, but even then, microclimates in Zone 9 demand extra attention.
If you’ve ever watched your camellia wilt under summer heat or fail to establish roots in rushed spring plantings, you’re not alone. The solution? Timing your planting to align with cooler temperatures and natural rainfall patterns.
I’ll walk you through the exact months to plant, how to spot the perfect microclimate cues, and why avoiding summer planting is non-negotiable for these delicate beauties.
You’ll also discover how to prepare your soil, adjust for urban heat islands, and recognize the warning signs of transplant shock. With these strategies, your camellias won’t just survive—they’ll flourish, rewarding you with vibrant blooms that last well into spring.
Ready to transform your garden? Let’s dive into the secrets of planting camellias in Zone 9 the right way, so you can enjoy their stunning flowers for years to come.
Optimal planting windows for Zone 9 camellias by seasonal microclimates
In Zone 9, where winters are mild and summers scorching, planting camellias at the wrong time can spell disaster. The key is leveraging cooler months when soil temperatures drop below 75°F—this helps roots establish before the heat ramps up.
Coastal areas may have a slightly longer window, while inland zones face stricter timing due to urban heat islands.
For coastal Zone 9 gardeners, late fall (November) through early spring (February) offers the best conditions. The ocean breeze moderates temperatures, reducing heat stress. Inland areas should aim for December to January when nighttime temps consistently drop below 60°F.
These microclimate differences mean your neighbor’s perfect timing might not work for your garden!
Here’s the golden rule: Plant when soil temps are 60-70°F and daytime highs stay under 80°F. This window aligns with camellia dormancy, giving roots time to spread before summer’s intensity.
Skipping this cue leads to transplant shock or stunted growth—neither of which you want for these long-lived shrubs.
| Microclimate | Best Planting Window | Soil Temp Threshold | Key Cue |
|---|---|---|---|
| Coastal | Late November - Early March | 55-70°F | First morning frost risk drops below 10% |
| Inland | Mid-December - Late January | 60-68°F | Nighttime temps consistently below 60°F |
| Urban Heat Island | January - Early February | 58-65°F | Humidity rises above 50% (reduces evaporation) |
| All Microclimates | Avoid Summer Planting | N/A | Soil temps exceed 75°F for 3+ days |
Don’t overlook humidity triggers—camellias thrive when relative humidity stays above 50%. Inland zones often hit this mark in late winter, while coastal areas may see higher humidity year-round.
Use a hygrometer to track moisture levels if you’re unsure. This small tool can save your camellias from drought stress during their critical root-establishment phase.
Another pro tip: Mulch heavily (3-4 inches) with organic matter like wood chips or compost. This keeps soil temps stable and retains moisture—critical in Zone 9’s fluctuating microclimates. I’ve seen camellias planted in February with mulch thrive where unmulched plants struggled by May. The difference? A 5°F cooler soil environment.
For container-grown camellias, timing shifts slightly. These plants adapt faster to temperature changes, so you can stretch the window to March if using 5-gallon pots or larger.
Just ensure the container has drainage holes and use well-draining potting mix to prevent root rot—a common pitfall in Zone 9’s humid summers.
Watch for new leaf growth as your cue for success. If your camellia sprouts fresh leaves within 6-8 weeks of planting, you’ve nailed the timing. No leaves?
Reassess your microclimate conditions—it might be too hot or dry. Adjust by moving to a shadier spot or increasing water slightly (but never soggy!).
Remember: Zone 9’s "off-season" is your ally. While others battle summer heat, you’re planting for year-round blooms. Stagger plantings in November and January to extend your camellia’s flowering window. This two-phase approach ensures continuous color from late fall through spring—exactly what Zone 9 gardeners dream of.
How to adjust planting timing for year-round blooms in Zone 9
Camellias in Zone 9 can bloom year-round with the right planting timing and care adjustments. The key is to stagger your planting schedule and align it with their natural growth cycles.
By planting different varieties at slightly different times, you’ll create a cascading bloom effect that keeps your garden vibrant from late fall through spring.
Start with late fall plantings (November) for varieties that bloom in winter. These plants will establish roots during the cooler months and burst into flowers just as the weather cools down.
Then, add early spring plantings (February-March) to extend blooms into summer, though summer blooms may be lighter due to Zone 9’s heat.
To encourage continuous blooms, prune lightly after each flowering cycle. This removes spent blooms and stimulates new growth. For example, after your winter-blooming camellias finish, prune them in early spring to prompt summer regrowth. Use sharp, sterilized shears and avoid cutting into old wood, which won’t regrow.
Soil amendments play a crucial role in syncing blooms with your planting schedule. Before planting, mix in organic compost or aged manure to enrich the soil. This provides a steady supply of nutrients that supports root development and flower production.
For acid-loving camellias, add sulfur or peat moss to maintain a pH between 5.5 and 6.5.
Fertilizing at the right time is another game-changer. Apply a balanced 10-10-10 fertilizer in early spring to kickstart growth, then again in early fall to prepare for winter blooms.
Skip fertilizing during the summer heat, as this can stress the plant. Instead, focus on deep watering to keep roots cool and hydrated.
Here’s how to time it all for maximum impact:
Plant winter-blooming varieties like Camellia sasanqua. These thrive in cooler temps and establish roots before winter.
Add spring-blooming types like Camellia japonica. Prune lightly after blooms to encourage summer regrowth.
Amend soil with compost and sulfur before planting. This ensures nutrients are available when roots need them most.
Feed in early spring and fall only. Avoid summer feeding to prevent heat stress.
Water deeply in morning during heatwaves. Reduce frequency in winter to avoid soggy roots.
By following this staggered approach, your camellias will bloom continuously, turning your Zone 9 garden into a year-round spectacle. Just remember: patience is key. It may take a season or two for plants to fully adjust, but the payoff is worth it.